Writing a Client Application Using an SDK
WSO2 API Cloud allows API consumers to download any of the supported client side SDKs for a Published API. API consumers can then use a downloaded SDK to write a software application to consume the subscribed APIs. This tutorial walks you through step-by-step instructions to write a client application using a downloaded SDK.
Write a client application with a static access token
Tip
Follow the tutorial Create and Publish an
API
to create and publish the PhoneVerification API. We
will use the PhoneVerification API to download the
Java SDK to be used when writing the client application.
If you use a different API, the SDK functions to invoke the API should
be based on the specifications of that API.
-
Follow the tutorial Subscribe to and Invoke an API to deploy the sample API, subscribe to it, and then generate keys.
Access Token
Once you generate the keys, copy the access token. You can use this token to invoke APIs that you subscribe to using the same application.
-
Go to the API Store, click on the
PhoneVerificationAPI, and then click the SDKs tab.
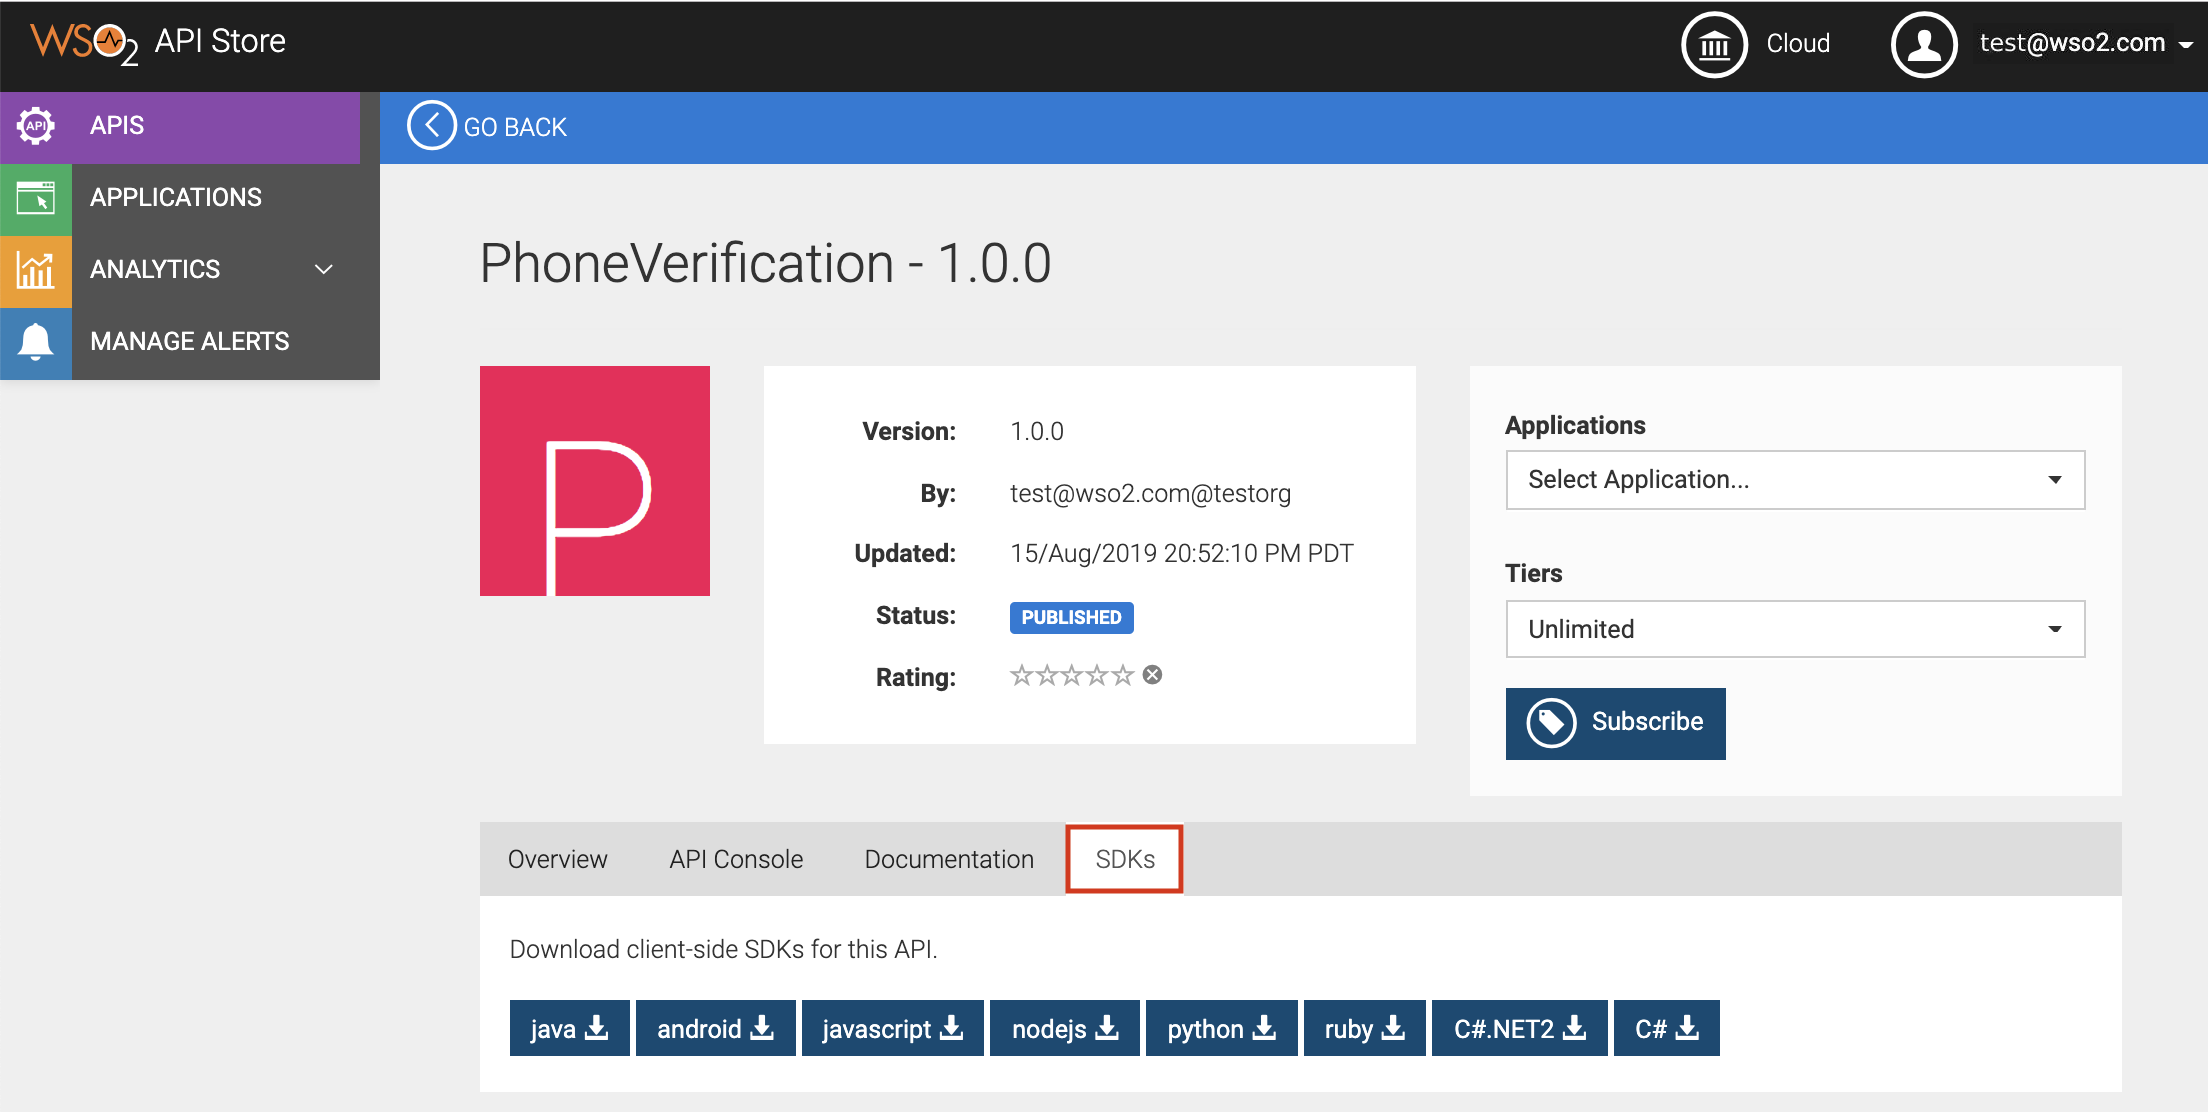
You will see the available client-side SDKs. -
Click java to download the java SDK of the
PhoneVerificationAPI as a ZIP file. This downloads thePhoneVerification_1.0.0_java.zipfile.Tip
When you download an SDK, you will see that the file name includes the API name, version, and language of the SDK.
-
Unzip the
PhoneVerification_1.0.0_java.zipfile. Once you unzip the file, you will see a directory structure similar to the following:Click here to see the directory structure of the unzipped file
PhoneVerification_1.0.0_java ├── build.gradle ├── build.sbt ├── docs │ ├── DefaultApi.md │ └── Payload.md ├── git_push.sh ├── gradle │ └── wrapper │ ├── gradle-wrapper.jar │ └── gradle-wrapper.properties ├── gradle.properties ├── gradlew ├── gradlew.bat ├── pom.xml ├── README.md ├── settings.gradle └── src ├── main │ ├── AndroidManifest.xml │ └── java │ └── org │ └── wso2 │ └── client │ ├── api │ │ ├── ApiCallback.java │ │ ├── ApiClient.java │ │ ├── ApiException.java │ │ ├── ApiResponse.java │ │ ├── auth │ │ │ ├── ApiKeyAuth.java │ │ │ ├── Authentication.java │ │ │ ├── HttpBasicAuth.java │ │ │ ├── OAuthFlow.java │ │ │ └── OAuth.java │ │ ├── Configuration.java │ │ ├── GzipRequestInterceptor.java │ │ ├── JSON.java │ │ ├── Pair.java │ │ ├── PhoneVerification │ │ │ └── DefaultApi.java │ │ ├── ProgressRequestBody.java │ │ ├── ProgressResponseBody.java │ │ └── StringUtil.java │ └── model │ └── PhoneVerification │ └── Payload.java └── test └── java └── org └── wso2 └── client └── api └── PhoneVerification └── DefaultApiTest.java -
Use Maven to build the SDK. For detailed information, see Building a Project with Maven .
Once you build the SDK, you can include the SDK as a dependency in your software project. For details on the Maven dependency, take a look at theREADME.mdfile.Maven dependency Expand source
<dependency>
    <groupId>org.wso2</groupId>
    <artifactId>org.wso2.client.PhoneVerification</artifactId>
    <version>1.0.0</version>
    <scope>compile</scope>
</dependency>
Build using maven
You can build the SDK using the
mvn clean installcommand inside the root directory. For more information see Maven Start Guide. -
After creating a maven project, import the following with respect to the SDK. These classes will be accessible from the code once the SDK is built using maven and will be included as maven dependencies in the project.
import org.wso2.client.api.*; import org.wso2.client.api.auth.*; import org.wso2.client.model.PhoneVerification.*; import org.wso2.client.api.PhoneVerification.DefaultApi; -
Create an instance of the
DefaultApiobject in the java code. This instance is necessary to get the API client, which handles the operations related to consuming the API, using the resources of the API.DefaultApi defaultApi = new DefaultApi(); -
Use the API client of the
DefaultApiobject instance to set HTTP request headers with required data. The HTTP request header might differ from one API to another depending on the implementation of the API. Following is a sample:ApiClient apiClient = defaultApi.getApiClient(); apiClient.addDefaultHeader("Accept", "application/json"); -
Include the access token as a header in the API client object as follows to invoke the API:
String accessToken = "bc392b16-6ce2-3208-9023-8938fbc376ea";
apiClient.addDefaultHeader("Authorization", "Bearer " + accessToken);
Warning
You need an access token to invoke the API. It is important to have a valid subscription to obtain an access token before using the SDK. Note that the obtained access token has an expiration time.
-
Set the base path to the API client.
apiClient.setBasePath("https://gateway.api.cloud.wso2.com/t/testorg/phoneverify/1.0.0")The base path for the client application is the production (or sandbox) URL of the API, which you see in the Overview tab of the API.
-
Once the
ApiClientobject has all the required data, set theApiClientfor the instance of theDefaultApiobject.defaultApi.setApiClient(apiClient); -
Call the available function in the SDK to get the response from the API.
Write a client application with a renewable access token
The client application in the example above uses a hard coded access
token when sending the request. However, in real world use cases, you
should not hard code the access token because it expires after
a specific period.
Following is a sample code that demonstrates how you can use an access
token that renews and is auto-generated before sending the API request.
In addition, the following example also demonstrates how you can
regenerate the token and retry the request upon failure. The following
custom client application uses an interceptor that is plugged into the
client to achieve the specified customization.
import com.squareup.okhttp.Interceptor;
import com.squareup.okhttp.Request;
import com.squareup.okhttp.Response;
import org.wso2.client.api.ApiClient;
import org.wso2.client.api.ApiException;
import org.wso2.client.api.PhoneVerification.DefaultApi;

import java.util.HashMap;
import java.util.List;
import java.util.Map;

public class APIClient {

    public static void main(String[] args) throws ApiException {
        DefaultApi defaultApi = new DefaultApi();
        ApiClient apiClient = defaultApi.getApiClient();

        // Creates an interceptor that intercepts every request sent by the client to include the authorization header
        Interceptor renewTokenInterceptor = new Interceptor() {
            String accessToken = null;

            public Response intercept(Chain chain) throws IOException {
                // If there is an access token already, use it for the next request, otherwise generate a token
                if (accessToken == null) {
                    getAccessToken();
                }

                // Send the original request with the Authorization header added and get the response
                Request originalRequest = chain.request().newBuilder().addHeader("Authorization", accessToken)
                        .build();
                Response response = chain.proceed(originalRequest);

                // If the response failed, retry the request with a new access token
                if (!response.isSuccessful()) {
                    getAccessToken();
                    Request newRequest = originalRequest.newBuilder().removeHeader("Authorization")
                            .addHeader("Authorization", accessToken).build();
                    response = chain.proceed(newRequest);
                }
                return response;
            }

            private void getAccessToken() throws IOException {
                // Implement this method to call the token API and retrieve the access token
                accessToken = "Bearer " + // set access token here
            }
        };

        // Set the interceptor to the client
        apiClient.getHttpClient().interceptors().add(renewTokenInterceptor);

        apiClient.addDefaultHeader("Accept", "application/json");
        apiClient.setLenientOnJson(true);
        apiClient.setBasePath("https://gateway.api.cloud.wso2.com/t/testorg/phoneverify/1.0.0");

        // TODO: call the available function in the SDK to get the response from the API


    }
}