Use OAuth2 Protected Backends
WSO2 API Cloud allows you to expose your backend APIs as managed and secured APIs. API Cloud supports Basic and Digest OAuth protocols to secure backend APIs. However, there can be situations where back-ends are secured with OAuth2. This section describes how you can integrate WSO2 API Cloud with a backend secured with OAuth2.
Note
Before you begin,
- Create and publish an API. For step-by-step instructions, see Create and Publish an aPI
- Go to the API Store and subscribe to and invoke the API. For step-by-step instructions, see Subscribe to and Invoke an aPI.
You will get an error from the backend saying credentials are missing in the request. This is because you are not passing the access token required for accessing the backend.
Follow the steps below to perform the configuration to generate and pass an access token to the backend.
-
Copy the following sequence and save it as an xml file.
<?xml version="1.0" encoding="UTF-8"?> <sequence xmlns="http://ws.apache.org/ns/synapse" name="simple-token-gen" trace="disable"> <property description="client_credentials" name="app-client-auth" scope="default" type="STRING" value="{base64encoded(clientKey:clientSecret)}" /> <property expression="json-eval($)" name="message-body" scope="default" type="STRING" /> <property expression="get-property('axis2','REST_URL_POSTFIX')" name="resource" scope="default" type="STRING" /> <payloadFactory media-type="xml"> <format> <soapenv:Envelope xmlns:soapenv="http://schemas.xmlsoap.org/soap/envelope/"> <soapenv:Body> <root xmlns=""> <grant_type>client_credentials</grant_type> </root> </soapenv:Body> </soapenv:Envelope> </format> <args /> </payloadFactory> <header expression="fn:concat('Basic ', get-property('app-client-auth'))" name="Authorization" scope="transport" /> <header name="Content-Type" scope="transport" value="application/x-www-form-urlencoded" /> <property description="messageType" name="messageType" scope="axis2" type="STRING" value="application/x-www-form-urlencoded" /> <property description="REST_URL_POSTFIx" name="REST_URL_POSTFIX" scope="axis2" type="STRING" value="" /> <call blocking="true"> <endpoint name="token"> <http method="post" uri-template="{token-endpoint-url}" /> </endpoint> </call> <property expression="get-property('resource')" name="REST_URL_POSTFIX" scope="axis2" type="STRING" /> <property description="generated_token" expression="json-eval($.access_token)" name="generated-access-token" scope="default" type="STRING" /> <header expression="fn:concat('Bearer ', get-property('generated-access-token'))" name="Authorization" scope="transport" /> <payloadFactory media-type="json"> <format>$1</format> <args> <arg evaluator="xml" expression="get-property('message-body')" /> </args> </payloadFactory> </sequence> -
In the saved xml file, replace the following placeholders with corresponding values.
{base64encoded(clientKey:clientSecret)}- The client key and client secret, separated by a colon and base64 encoded.{token-endpoint-url}- The token endpoint URL of the backend authorization server.
- Sign in to the API Publisher.
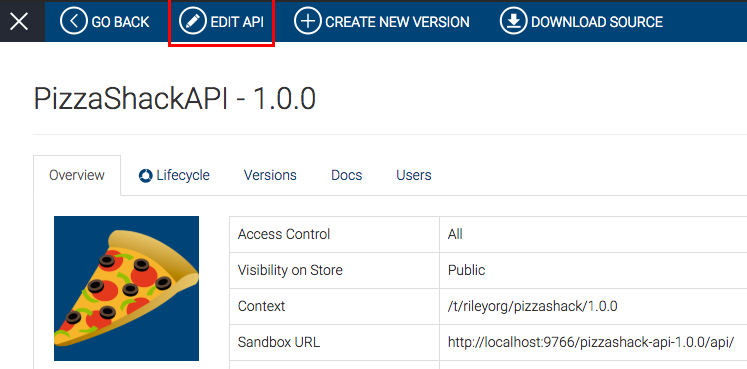
- Select your API and click Edit.

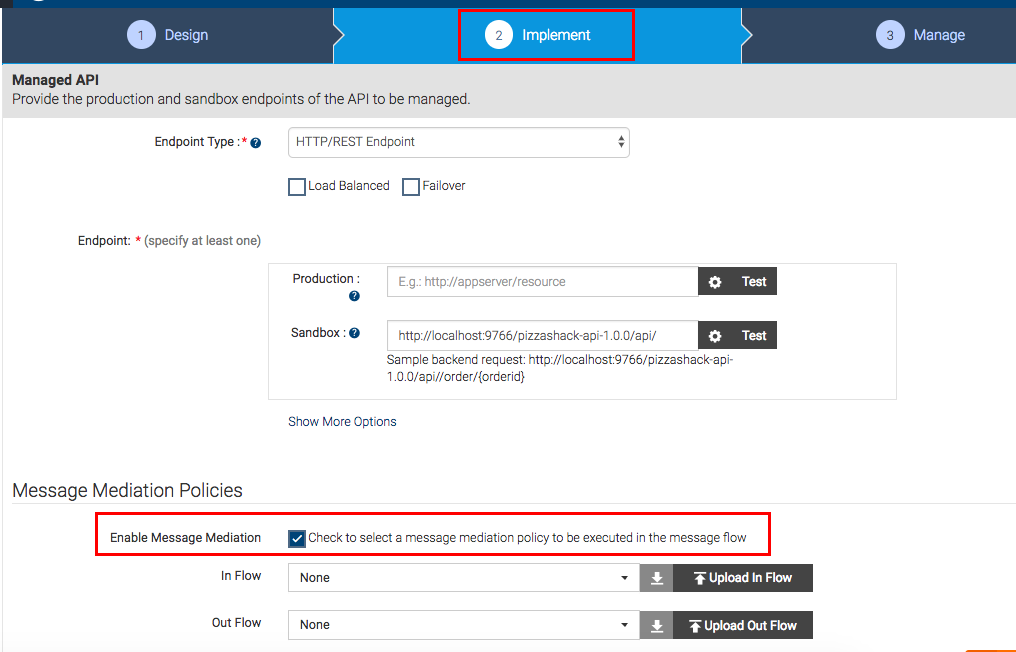
- Go to the Implement tab and select Enable Message
Mediation.

- Click Upload In flow and upload the saved sequence file.

- Save and publish the API.
You can now successfully invoke your API.
Top